> For the complete documentation index, see [llms.txt](https://www.opal-rt.com/docs/llms.txt). Markdown versions of documentation pages are available by appending `.md` to page URLs; this page is available as [Markdown](https://www.opal-rt.com/docs/op5705xg/get-started/unbox-the-simulator/mount-the-simulator-in-a-rack-optional.md).
# Mount the Simulator in a Rack (Optional)
Usually, the rack mount brackets and handles are not assembled to the chassis.
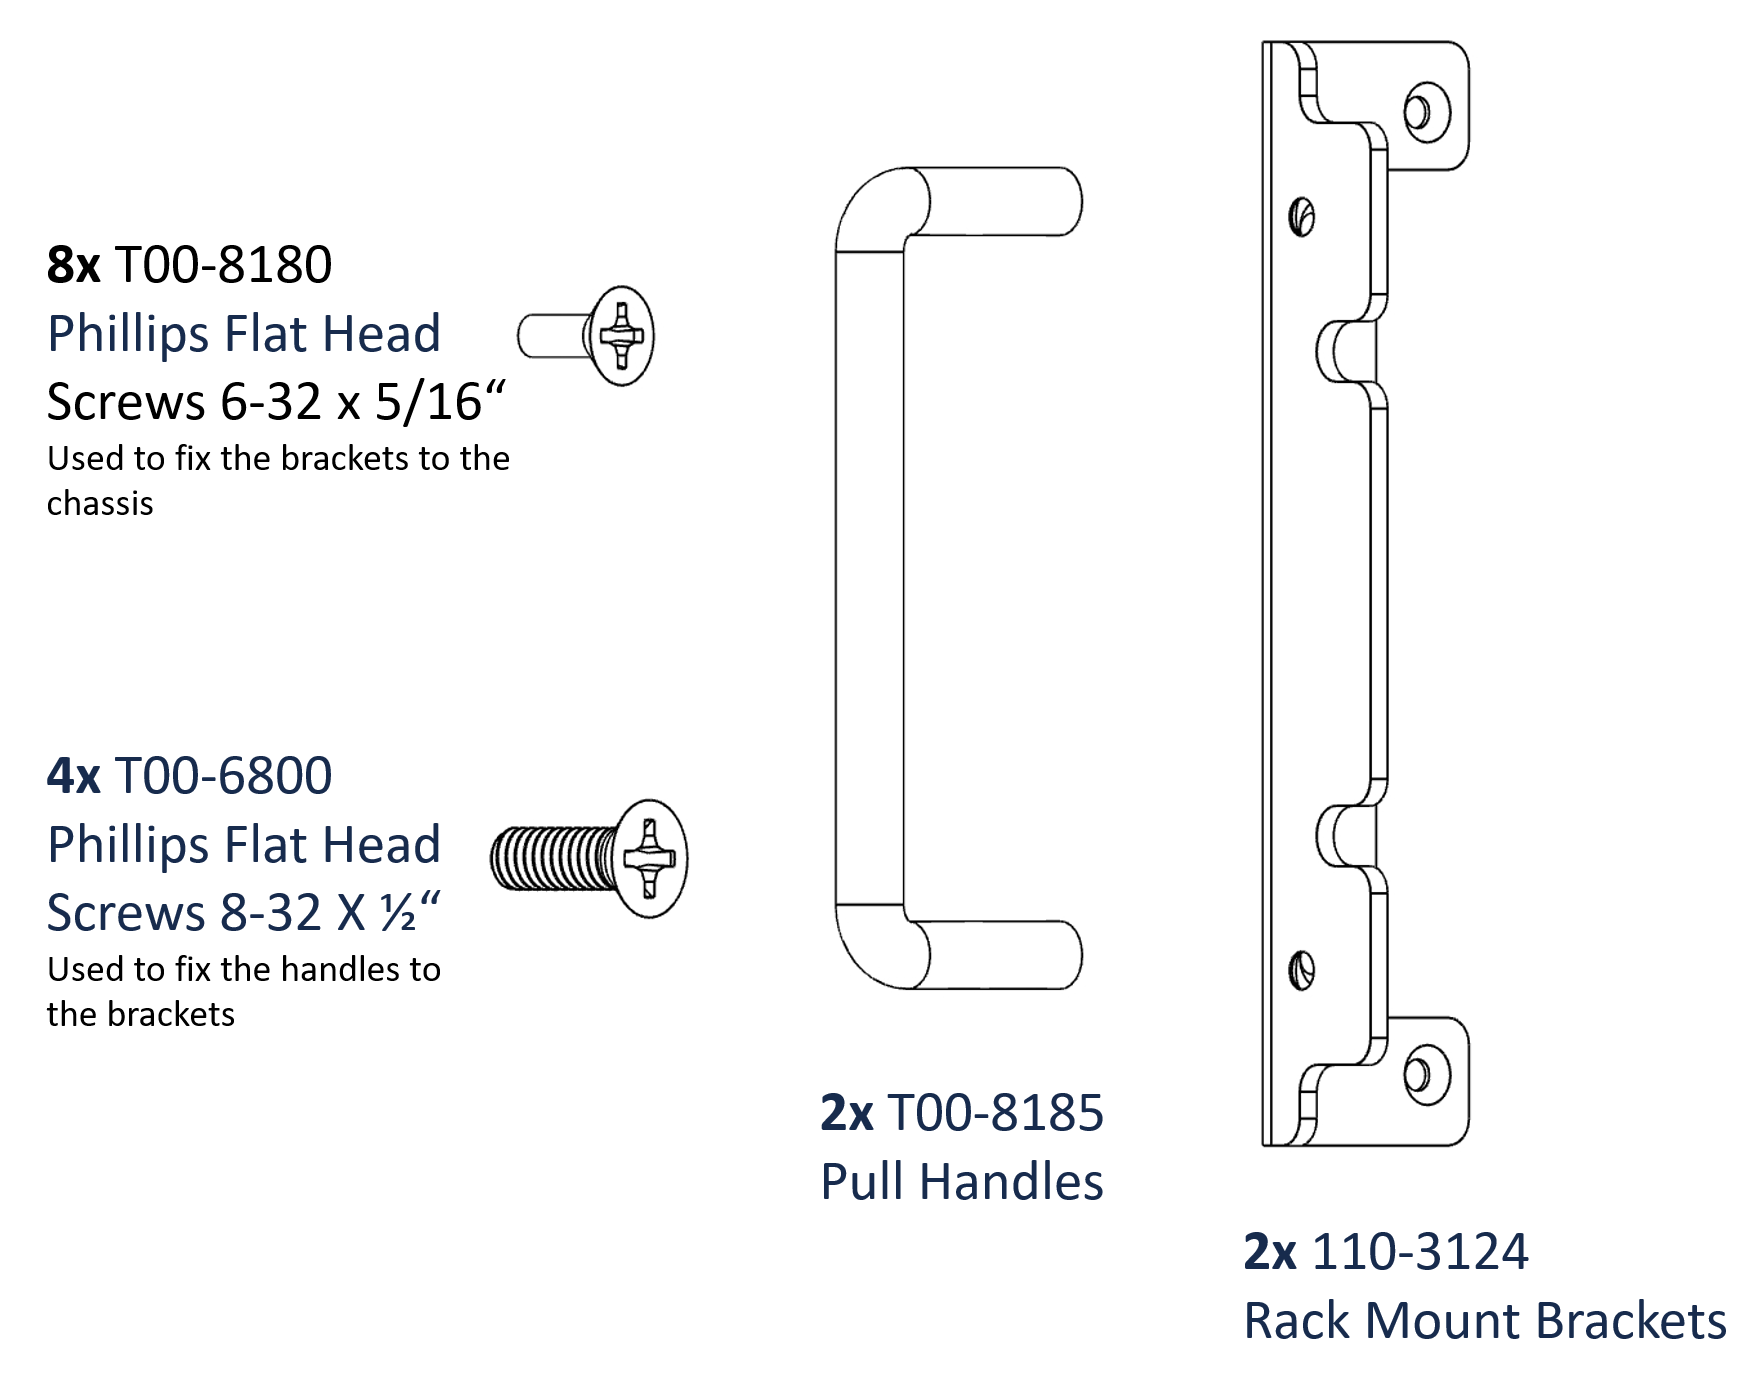
## Hardware list
The hardware for the rack mount brackets and handles are provided in a plastic bag.
* 2x 110-3124 - 3U Rack Mount Brackets
* 2x T00-8185 - Pull Handles Black Anodized Alu. 8-32 x 3.5”
* 4x T00-6800 - Black SS Phillips Flat Head Screws 8-32 X ½” long
* 8x T00-8180 - Black, SS, Phillips Flat Head Screws 6-32 x 5/16” long
## Installation Steps
{% stepper %}
{% step %}
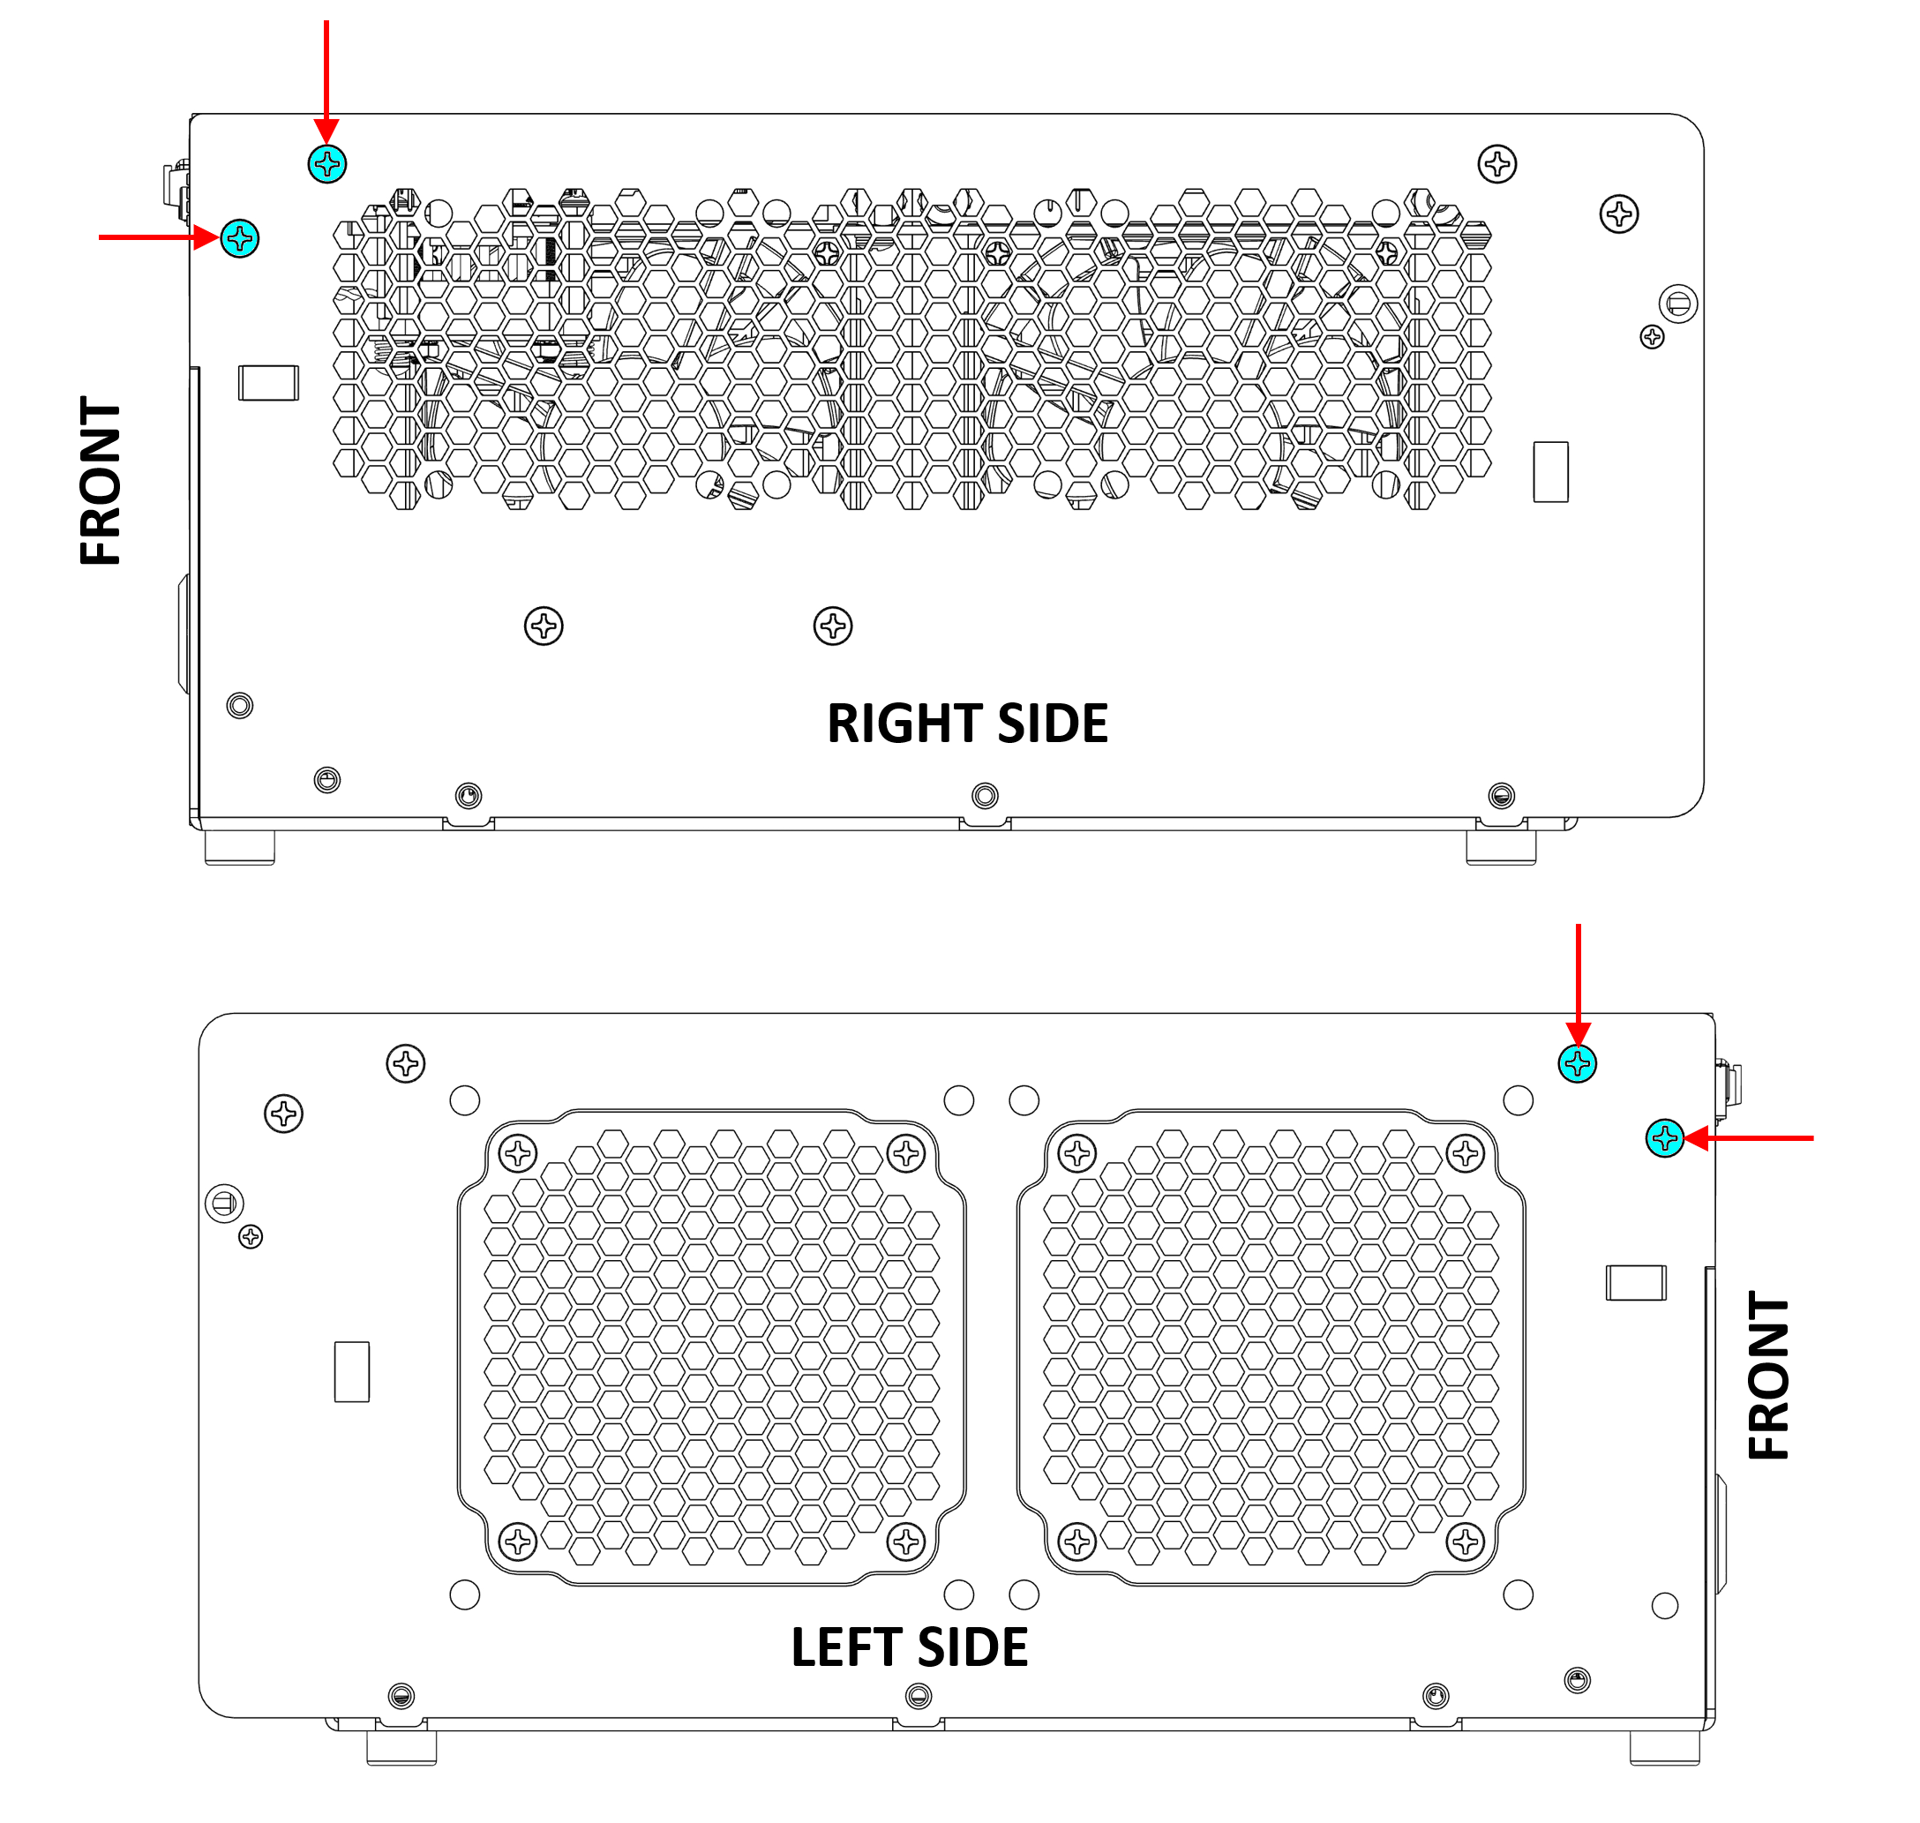
### Prepare the chassis
* For each side, remove the **two (2)** top-front screws.
* Set them aside. They will be replaced with longer screws.
{% endstep %}
{% step %}
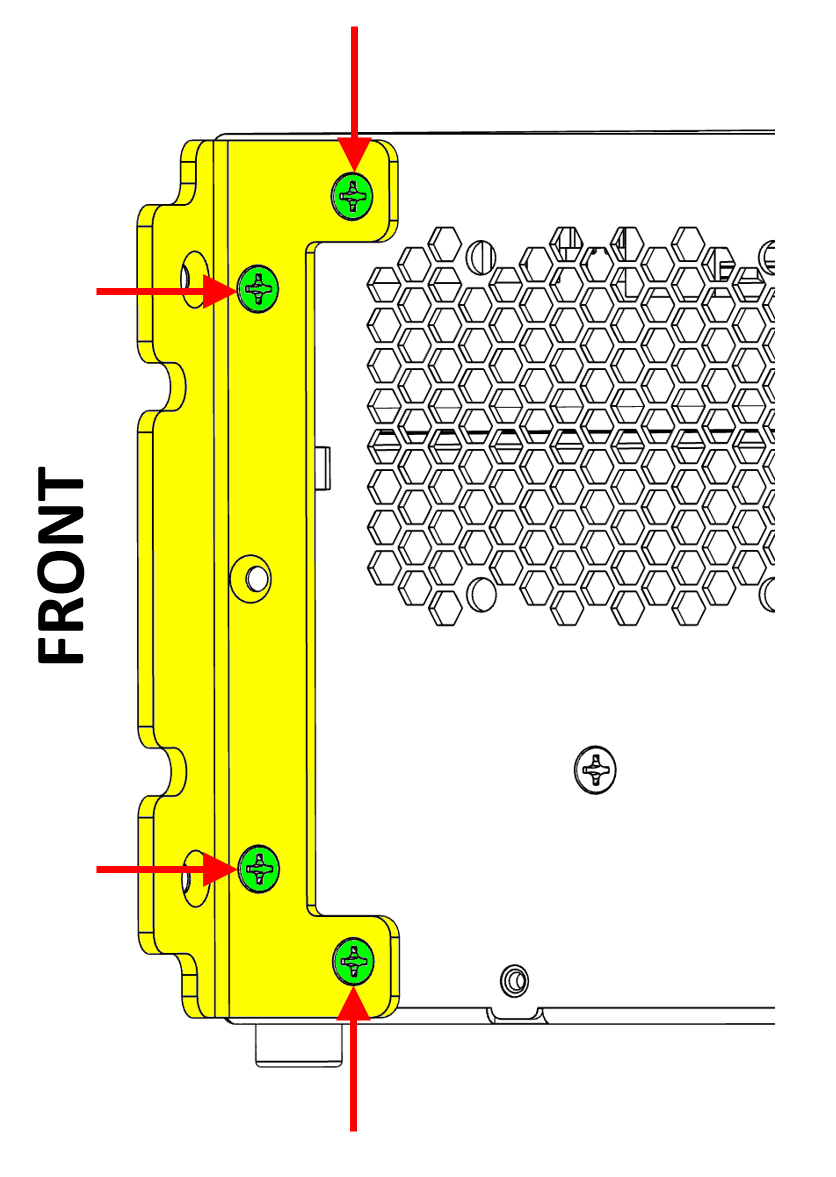
### Install the rack mount brackets
Secure each bracket with **4 × 6-32 × 5/16" flat head Phillips screws** (OPAL-RT P/N T00-8180).
{% endstep %}
{% step %}
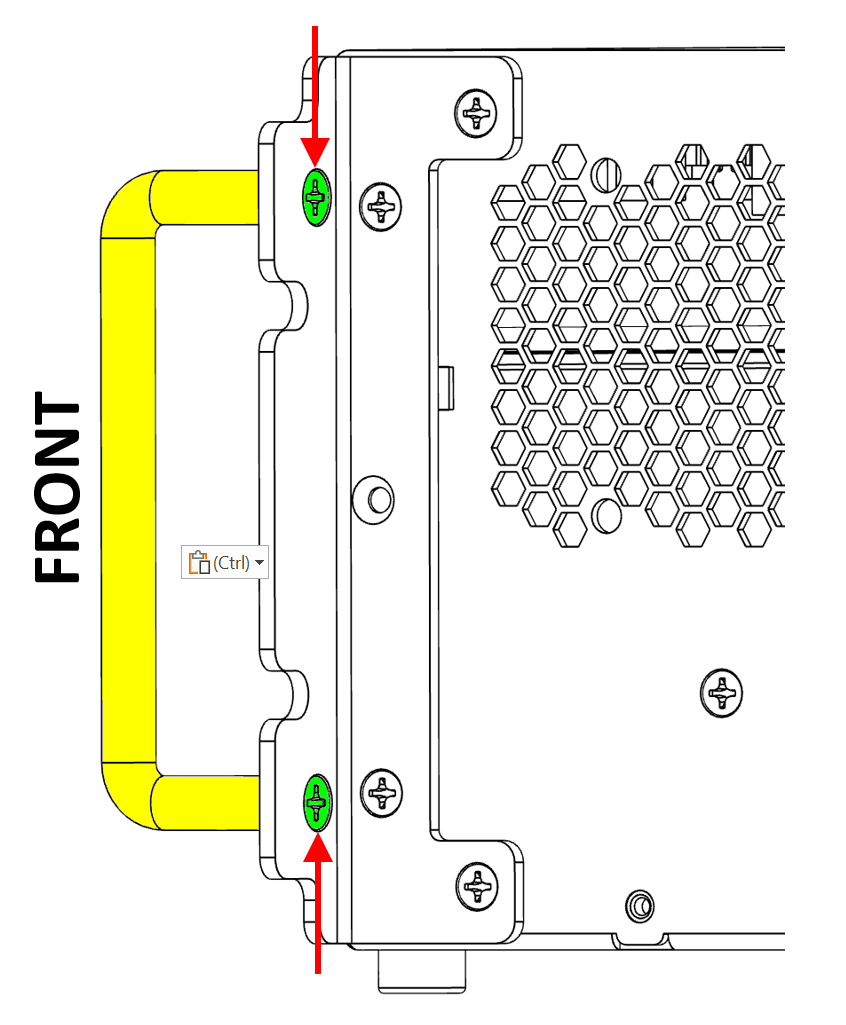
### Attach the handles
Secure each handle to its bracket with **2 × 8-32 × ½" flat head Phillips screws** (OPAL-RT P/N T00-6800).
{% endstep %}
{% step %}
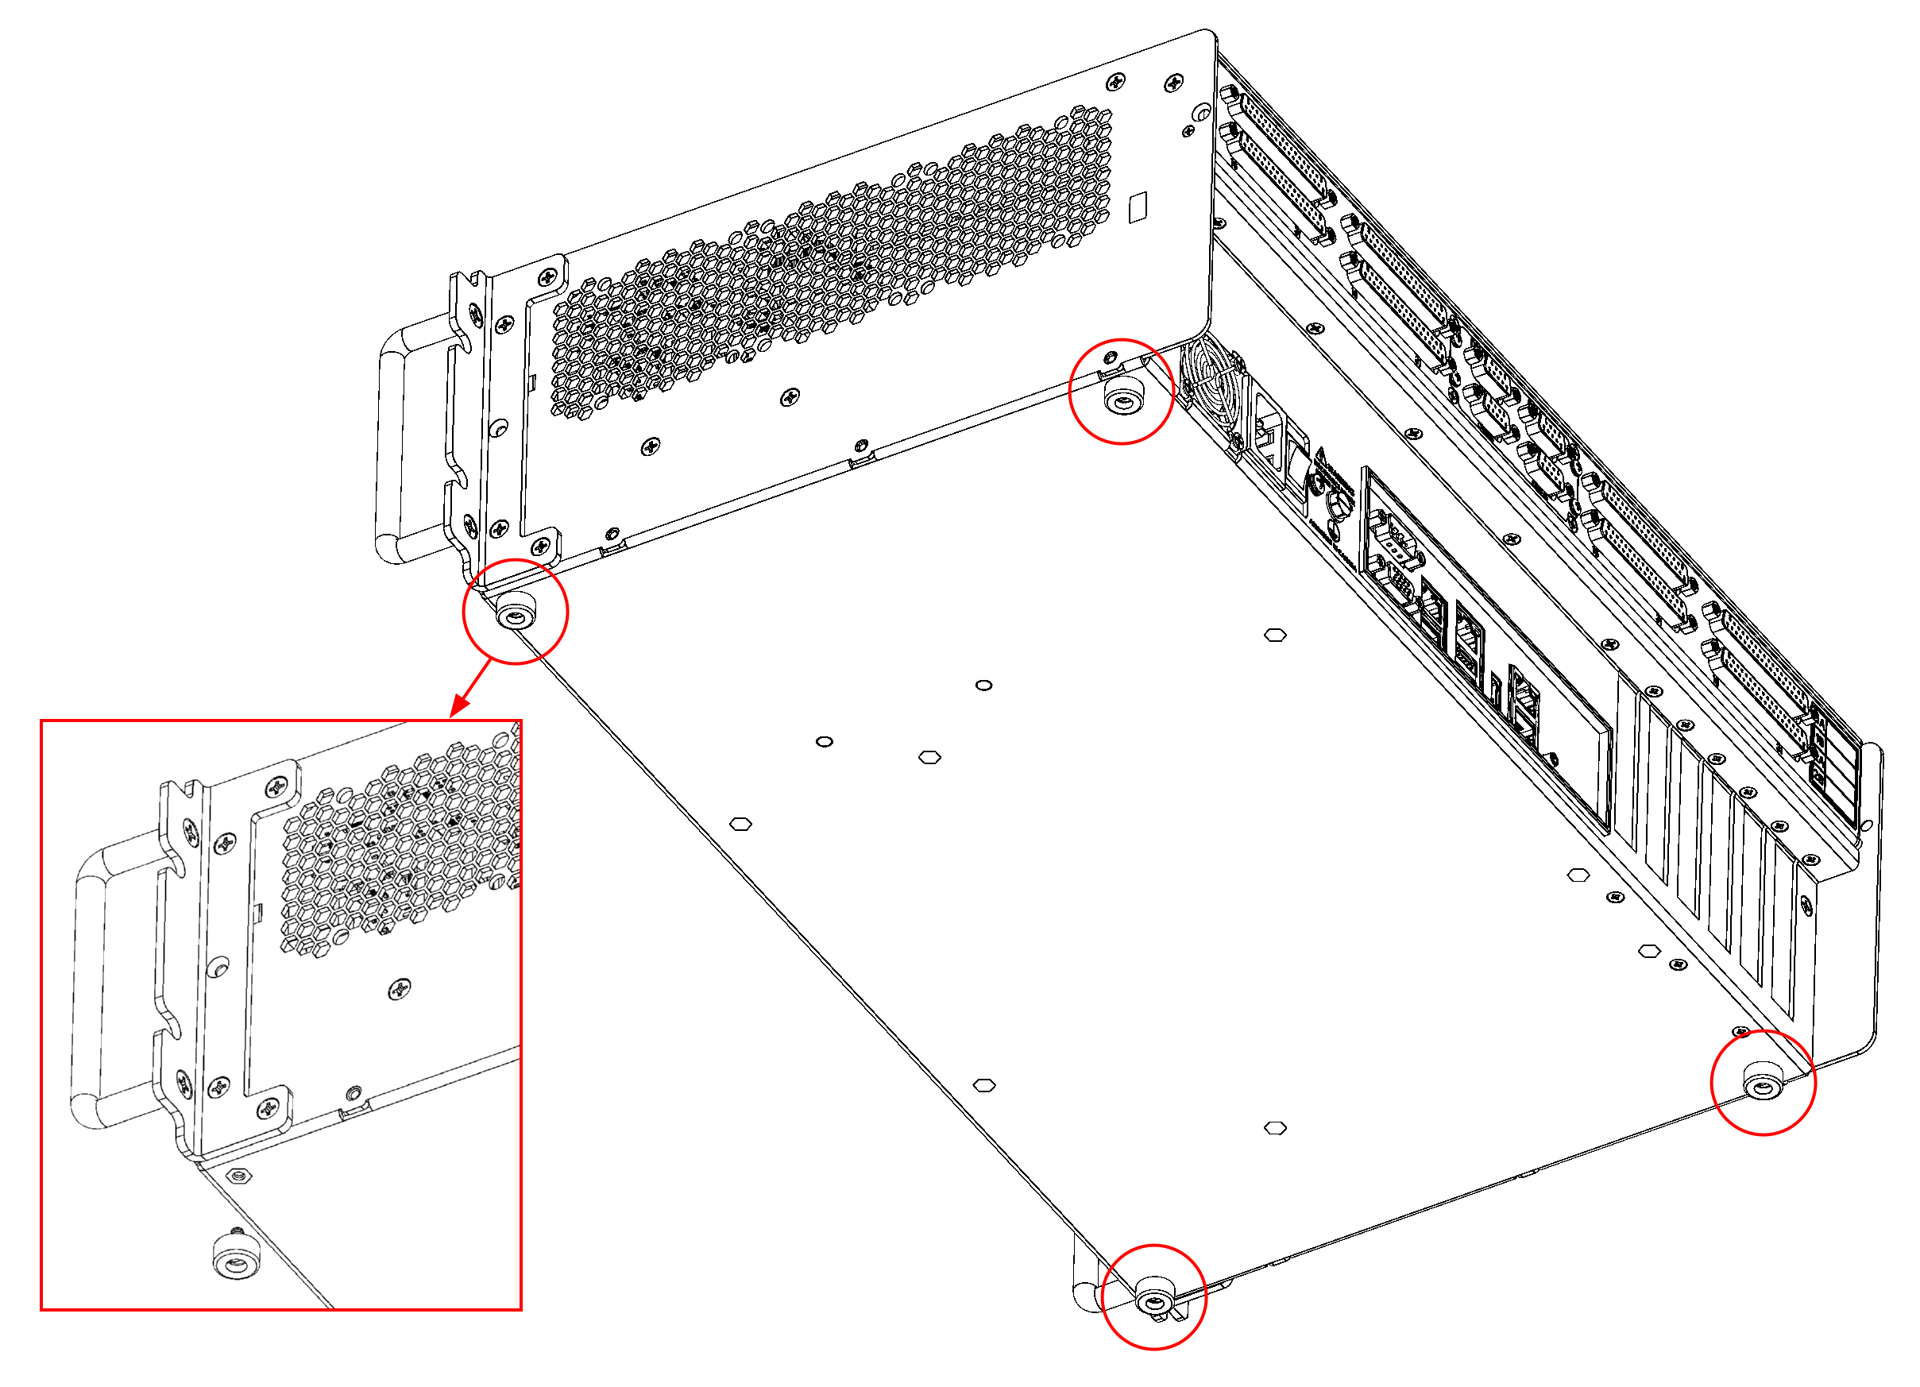
### Remove rubber feet (if needed)
If another unit is directly below the OP4610XG in the rack, remove the **4 rubber feet** by unscrewing them.
{% endstep %}
{% step %}
### Grounding (recommended for rack-mounted setups)
* Select a short, flat braided grounding strap with ring terminals on both ends.
* Attach one ring terminal to the **ground screw** on the OP5720XG.
* Attach the other terminal to the rack using a **nut and lock washer**.
{% hint style="info" %}
Proper grounding prevents electric shocks, protects against voltage spikes (e.g., lightning strikes) and improves EMI immunity by lowering noise levels and emissions.
{% endhint %}
{% hint style="info" %}
Ensure the **rear power switch** is always easily accessible for emergency shutdown.
{% endhint %}
{% endstep %}
{% endstepper %}
---
# Agent Instructions
This documentation is published with GitBook. GitBook is the documentation platform designed so that both humans and AI agents can read, navigate, and reason over technical content effectively. Learn more at gitbook.com.
## Querying This Documentation
If you need additional information that is not directly available in this page, you can query the documentation by asking a question.
Perform an HTTP GET request on the following URL with the `ask` and `goal` query parameters:
```
GET https://www.opal-rt.com/docs/op5705xg/get-started/unbox-the-simulator/mount-the-simulator-in-a-rack-optional.md?ask=&goal=
```
`ask` is the immediate question: it should be specific, self-contained, and written in natural language.
`goal` is what the user is ultimately trying to achieve, the reason they need the answer. Sharing it helps GitBook give you a better, more relevant answer. A goal is most helpful when it describes the outcome the user wants rather than restating the question. For example, with `ask=how do I create an API token`, a goal like `automate deployments from our CI pipeline` lets GitBook tailor the answer to that use case.
The response will contain a direct answer to the question and relevant excerpts and sources from the documentation.
Use this mechanism when the answer is not explicitly present in the current page, you need clarification or additional context, or you want to retrieve related documentation sections.