Teaching power factor correction with real-time AC-DC converter models
Power Electronics
07 / 12 / 2026

Key Takeaways
- Students understand power factor correction best when waveform changes are tied directly to control actions.
- Active power factor correction should be taught as a current-shaping control problem, not as a definition to memorize.
- A staged lab sequence builds stronger judgment than a single polished demonstration.
Students grasp power factor correction fastest when they can tune a controller and watch the input current waveform respond at once.
Lectures still matter, yet equations alone won’t show why a rectifier can meet a load and still stress the source. Students need to see current spikes, phase shift, and bus regulation at the same time. A major review of 225 studies found active learning raised examination scores by about 6%. That result fits power electronics especially well because waveform judgment is a skill grounded in observation and repetition.
Teaching power factor correction works best when AC-DC conversion is treated as a control problem with visible electrical consequences. Students should leave the lab able to connect poor input current shape to measured power factor, then connect a better controller to cleaner line current. A real-time model shortens that path because the circuit and the code answer back at once. That immediate feedback builds confidence faster than a static schematic ever will.
When poor power factor becomes visible in student measurements
Poor power factor becomes visible the moment students compare voltage and current on the same time base and then relate those waveforms to watts and volt-amperes. The issue stops being abstract. A bad front end still powers the load. It just pulls current in the wrong shape or at the wrong time.
A simple bench setup makes this plain. Students can feed a diode bridge with a bulk capacitor from the AC source and then observe narrow current pulses near the voltage crest. A wattmeter will often show the load is working properly, yet the current probe will show sharp peaks and a poor crest factor. That picture gives meaning to the phrase power factor correction before any control code is written.
That measurement step matters because many students first assume low power factor means low efficiency. It doesn’t. The converter can still deliver the required DC power while asking the source for a larger RMS current than necessary. Once students see that mismatch, they’re ready to understand why a PFC converter exists and what active power factor correction is supposed to fix.
What active power factor correction fixes in AC-DC conversion
Active power factor correction fixes the way an AC-DC front end draws current from the source while still regulating the DC bus for the downstream load. It reshapes input current. It reduces phase error and distortion. It makes the source see a cleaner electrical load.
Students should hear this in plain language. The circuit is not adding useful power to the load. It is improving how that power is taken from the line. Servers, chargers, motor controllers, and lab supplies all rely on front ends that solve this same problem. Data centres used 240 TWh to 340 TWh in 2022, equal to about 1% to 1.3% of global electricity use.
That scale helps students see why line current quality belongs in an AC-DC course. A poor front end means more RMS current for the same useful output and more stress on conductors and source components. Active power factor correction also creates a cleaner starting point for whatever follows the front end. Students will remember that purpose far better than a definition lifted from a slide.
How a boost PFC converter shapes line current
A boost PFC converter shapes line current by forcing the inductor current to track a reference that follows the rectified input voltage. The switch does the shaping. The diode and capacitor maintain a higher DC bus. The controller links current shape to bus regulation.
Students usually understand this faster with one repeated picture. When the line voltage rises, the current reference rises with it. When load power increases and the DC bus droops, the controller increases the reference amplitude so the converter pulls more input current over the full line cycle. That relationship turns a static schematic into a working system with purpose.
The boost stage also gives a clean teaching advantage because the bus voltage sits above the rectified line peak. Students can see why that headroom matters for current control. If the bus target is set too low, shaping falls apart near the crest.
“If the bus target is set sensibly, the current loop has room to work and the input current starts to resemble the line voltage.”
Why real-time models teach closed-loop behaviour faster
Real-time models teach closed-loop behaviour faster because students can disturb the converter, watch the response, and retune the controller without rebuilding hardware. Cause and effect stay close in time. That speed improves judgment. It also makes failure modes safe enough to study instead of avoid.
A real-time setup lets you step the load, alter the voltage reference, and inject a line sag during the same lab session. Students don’t have to imagine what the current loop is doing because the waveforms answer immediately. The OPAL-RT starter kit fits this teaching pattern well because students can watch current shaping respond to their own control code while the AC-DC PFC experiment is still running.
That matters more than convenience. Closed-loop concepts often fail in first exposure because each variable moves at a different speed and students lose the thread between command, state, and output. A real-time model compresses that delay. Students will spot overshoot, ripple, and current clipping sooner, and they’ll connect those effects to code changes while the reasoning is still fresh.
Which control variables students should tune first

Students should tune control variables in an order that keeps the converter stable and makes each adjustment visible on a waveform. Start with the bus target. Then shape the current loop. Finish with the slower outer loop so students can separate fast action from slow correction.
- Set the DC bus reference high enough above the rectified line peak.
- Tune current loop gain until the inductor current follows the reference cleanly.
- Limit the outer voltage loop bandwidth so line ripple does not dominate.
- Add input voltage feedforward if the reference amplitude drifts with line changes.
- Check current limits so protection does not masquerade as poor tuning.
A good student sequence starts with the current loop disconnected from bus regulation. You can give a fixed current reference and ask students to watch tracking quality over one line cycle. Once that looks clean, the voltage loop can be closed and kept deliberately slow. Students then see that the outer loop sets current amplitude while the inner loop shapes the waveform.
This order prevents a common lab problem where both loops are poorly tuned and no one knows which mistake caused the distortion. It also helps students speak precisely. They won’t say the converter is unstable when the issue is really a low bus reference or a saturated current command. That precision is an important teaching outcome on its own.
A lab sequence that turns code into waveform insight
The best lab sequence starts with a passive rectifier, adds a boost stage, and then closes the loops one at a time so each waveform change has a clear cause. Students build the story in steps. Each step answers one question. The code becomes easier to trust because the electrical response is predictable.
One strong sequence uses five short milestones. Students first measure the input current of a bridge and capacitor front end. Next they run the boost stage with a fixed duty ratio to see why open-loop operation can’t hold the bus well. Then they add current control, then voltage control, and finally test line or load disturbances. That order turns abstract blocks into observed behaviour.
| Lab step | What students see | What the step proves |
| Passive rectifier measurement | Narrow current spikes cluster near the voltage crest. | Useful DC output does not guarantee good input current shape. |
| Open-loop boost stage | The bus drifts as line and load conditions shift. | Duty ratio alone cannot maintain the desired operating point. |
| Current loop only | Inductor current starts to track a commanded waveform. | Fast inner control is what shapes the line current. |
| Voltage loop added | The current amplitude adjusts to hold the bus target. | Outer control sets power flow while inner control preserves shape. |
| Disturbance test | Waveforms reveal overshoot, clipping, or slow recovery. | Tuning quality is judged best during disturbance tests because steady-state results can hide control problems. |
Students usually remember this sequence because each milestone changes what they can explain and strengthens what they can calculate. A line sag test is especially useful. You’ll see who understands bus energy storage, who understands current reference scaling, and who is still reciting terms without linking them to the waveforms on screen.
Common setup errors that distort PFC converter results
Distorted PFC converter results usually come from measurement choices, sampling limits, or controller constraints rather than from the topology itself. Students often trust the schematic too much. The lab setup matters just as much. Poor instrumentation can make a sound controller look broken.
A current probe with the wrong range can flatten peaks and hide clipping. A voltage measurement taken after a filter can shift timing enough to confuse phase interpretation. Students also run into trouble when the bus reference is set close to the rectified line peak, because the boost stage then loses room to shape current near the crest. The result looks mysterious until they check the operating limits first.
Sampling and loop timing create another set of errors. If the line voltage reference is noisy or poorly synchronized, the commanded current will wobble even when the hardware model is fine. A voltage loop that is too fast will pull double-line ripple into the current command and make the waveform look badly tuned. Good lab habits start with checking sensors, scaling, and timing before touching gains.
What students should be able to explain after testing
After testing, students should be able to explain how line voltage, current reference, inductor current, and DC bus regulation interact inside an active PFC converter. They should speak in cause-and-effect terms. They should justify tuning choices with measurements. They should also know what the circuit cannot fix.
A strong explanation sounds concrete. Students should be able to say that a falling bus voltage causes the outer loop to request more input current, while the inner loop shapes that current to follow the rectified line template. They should also be able to point to a distorted waveform and tell you if the cause is poor sensing, a low bus target, an aggressive voltage loop, or current saturation. That level of explanation shows actual understanding.
This is the standard a good lab should hold. Memorized definitions won’t help when a waveform looks wrong and the controller has to be corrected under time pressure. OPAL-RT fits this teaching goal because its starter kit lets students test that judgment against a live closed loop instead of stopping at a static diagram.
“Students should leave the bench able to defend what they changed, why they changed it, and what the converter did next.”

Power Electronics
09 / 30 / 2026
FPGA simulation for power electronics and motor drives
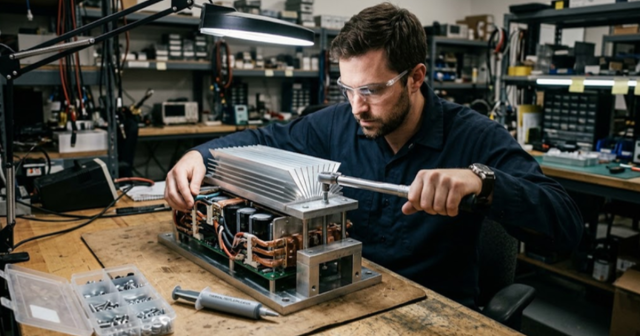
A technical comparison of CPU and FPGA solver architectures for power electronics and motor drive simulation, covering the timestep each reaches and how to split a model between them.
Power Electronics
09 / 29 / 2026
How to model and control a T-type three level inverter
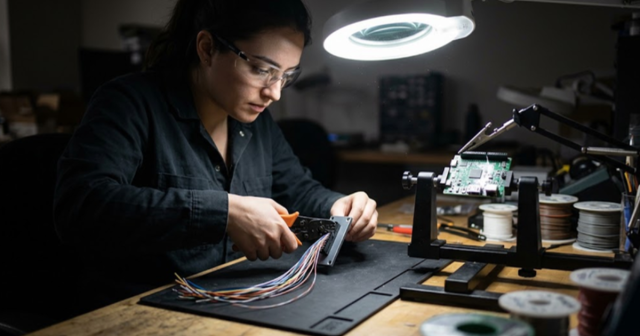
An engineering overview of the T-type three level inverter leg, covering how it reaches three voltage levels, where device stress lands, and how neutral point balancing and modulation shape control.
Simulation
09 / 28 / 2026
How CHIL signal-level testing validates embedded controllers
A practical look at signal level controller hardware in the loop testing, covering I/O ranges, sensor emulation, latency and the setup checks that make embedded controller results trustworthy.